~Recently I was asked to submit a project to celebrate the 4th of
July. My first thought was to make
bunting for a party. I thought a literal star spangled banner.

But that is really not our style. What is our style is Texas pride. I know I am a
Georgia peach living the good life in central Texas and my Texas family has filled me with Pride for the Lone star state. So for us I made
LoneStar bunting; but I also did a no-sew version of the original
star spangled banner. You choose which you is your
family's style!
 Materials LoneStar version
5@7x9 rectangles cut from white fabric( I used an old sheet)
5@3 1/2 x 5 red
rectangles with heat and bond attached to the back
5@3 1/2 x 5 white rectangles with heat and bond attached to the back
5@ 3 1/2 x 7 blue rectangles with heat and bond attached to the back
5 white stars with heat and bond attached to the back
5 yards of bias tape( whatever you have will work I had 1/2 ")
heat and bond liteiron
chalk
sewing machine
thread
Instructions Lonestar version1. Iron on heat and bond and cut out your pieces.I made paper patterns for all my pieces including a star. Also I used all scraps for these projects but you could
definitely go for a more matching coordinated look.
 2.lay out all your pieces
 and arrange them in a most pleasing manner.Lay your 5@7x9 rectangles cut from white fabric and arrange your flags on top of them.
 3. Iron on your pieces.4.Stitch down your pieces if you like.
( I really like the
stitching especially on the stars)
 5. pink the edges of your flags.
Use your pinking shears to trim up the three sides of your flags(leave the top side
un-pinked.)
 6.measure and mark your bias tape
.

I always eyeball everything first then I go back and measure and even
everything out. Here are measurements I came up with . I start the flags on each side at 10" inside. Then I lay down a flag and measure 8 " and repeat till all your flags have a home.
7. Attach flags to bias tape. cut 5 strips of heat and bond 7"x ?" (?= the width of your bias tape mine was 1/2") and iron to the front top of each flag.

Then iron the flags onto the marked locations.

You can choose to lay the bias tape flat

or fold it over the top edge of your flags. If you want to fold it over I
recommend using bias tape with adhesive already attached, or
stitching it after you fold.
 8. Hang your bunting with handmade pride!
 you can make loops on the ends if you like or just pin through the bias tape.

Materials star spangled version2 @7x9 blue rectangles
3@ 7x9 red rectangles
5 white stars with heat and bond attached to the back
5 yards of bias tape( whatever you have will work I had 1/2 ")
heat and bond lite
iron
chalk
Instructions star spangled version
1. Iron on heat and bond and cut out your pieces. I made paper patterns for all my pieces including a star. Also I used all scraps for these projects but you could
definitely go for a more matching coordinated look.
 2.lay out all your pieces
and arrange them in a most pleasing manner.

3. Iron on your pieces.
4. pink the edges of your flags. 
Use your pinking shears to trim up the three sides of your flags(leave the top side
un-pinked.)

5.measure and mark your bias tape.

I always eyeball everything first then I go back and measure and even
everything out. Here are measurements I came up with. I start the flags on each side at 10" inside. Then I lay down a flag and measure 8 " and repeat till all your flags have a home.
6. Attach flags to bias tape. cut 5 strips of heat and bond 7"x ?" (?= the width of your bias tape mine was 1/2") and iron to the front top of each flag.

Then iron the flags onto the marked locations. The you can lay the bias tape flat or fold it over the top edge of your flags. If you want to fold it over I
recommend using bias tape with adhesive already attached. or
stitching it after you fold.

7. Hang your bunting with handmade pride! 
you can make loops on the ends if you like or just pin through the bias tape.

 ~This year we are in a new house and tried as I might I still did not get any real veggie seeds in the ground till late may(?!). Tisk,tisk, I only went ahead and planted them out of desperation; I need that little watering time away from everything to calm the voices.
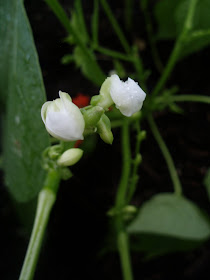
 But not only do I have plants I have flowers,
 fruit,
 and friends! he is just so cute, I also have a visiting toad....
 These babies get late sun(after 2), I am thinking, that is why they are not burning up completely... wish me luck


