
~Potato Prints are super fun and super easy. They are really almost self explanatory, and there are several ways to attack your potato. I did 3 potato print sessions in the last few weeks and used four different tutorials loosely. Let me admit here that I had never done potato printing or any other vegetable printing before this, even though I did study printmaking for FOUR years. So after a little bit of humiliation( my hubby laughed at me )I decide to dive into the world of potato printing, with Burger in tow.

~Our first printing session( and my first acquaintance with this printing technique) was inspired by
Lotta Jansdotter's book,
Lotta Prints .However I did the whole process from memory because I had to return the book (to the library) before we tackled the project. But I remember her saying to keep it simple. Which many times I find hard to do.

~We also used
The Colossal Book of Crafts (which is awesome and also a library book) as a reference.

...I love how this book is written directly to the crafty child, and it has some terrific project ideas. What a great birthday gift this would make for the 5-12 year old crafter .

~Next I turned to
Martha. I found
her suggestion to use cookie cutters very clean, fast and effective

... Although I decided to do a variation that only cuts away part of the potato because I thought the potato ends fit nicely into littler paws.

~During my 3rd (adult only) printing session I used these tiny food cutters I had stashed away as another variation on
Martha's cookie cutter method. . What a joy! I received these as a Christmas gift last year. I was not sure I would ever really use them at the time, even as I ogled over their cuteness. Now I cannot wait to use them again. Do not even ask why I have not used them to cut tiny PB &J's .... shame,shame on you mommy.

~The other printing tutorial I looked at was
First Palette.This one is great for helping with ideas and tips for the little ones.
*My tips for potato printing*I used all different sorts of printing mediums and surfaces.
1.For the little ones I would use any water based paint; brushed on or dipped in a stamping manner works well. Or if they like to play with the brayer, by all means play. But it is not a must have.

2.Again for the kids I recommend printing on large cheap paper like butcher paper or opened paper bags. Also with my 2 year old I found that concentrating on the process made this craft time most enjoyable. We just laid out a big Ole' piece of paper and experimented with all sorts of marks. Now we can wrap gifts in that paper or use it in collages.

...During our second printing he moved on to printing with all kinds of things , a rock a bottle cap. He just made that creative leap all by himself.

3. If working with kids that will not be cutting the potatoes, try and cut at least a few before hand so they will have something to work with from the get go.

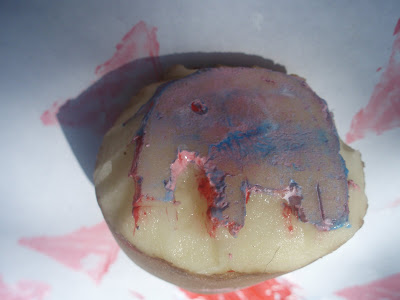
4. I recommend the cookie cutter method for your first few just( even if it is just you) to get you up and running. Once I had Burger printing I cut a few requests, like the elephant and the not so successful lion. However cutting potato images can be an experience in abstract expressionism so have fun !
5. Get freaky with your cutting tools. Cutting tools I used were knives, peelers,forks, wood carving tools, really here you can try anything. This is where you and older kids can really have some fun experimenting with mark making

6. If this is a project for yourself I suggest using a brayer and water based printing ink.( OK so that is burger with the brayer; but it was the only pic I had of the brayer)

...Printing with the brayer is smoother and cleaner and you can set the ink with heat, if you are printing on fabric.

7. Print and Have FUN!!

 ~Burger and I have had a fun week with our snail mail!


