
 ~SO I really wanted to make burger an advent calendar, I actually have never even had one myself.
 We have been really into discussing numbered Days and the order of our fall events so I thought we needed this holiday activity. I pulled this one together this weekend all from stuff around the house.

~I decide I would use bottle caps as the doors or boxes. I already collect them compulsively for pin cushions and I am always looking for other uses for my mounds of them however I usually only stash 2 types. So I stashed every bottle cap for the week and that gave me a nice assortment of caps.

All the little surprises came from around the house too. Burger is quite a littles collector and he has more than he knows. I went around after he was sleep and picked a bunch of little things to stash in the caps
 .
.materials
card board box flattened out
ruler
tape
scrap fabric or wrapping paper
felt for backing
hot glue gun
ribbon or trim
24 bottle caps
24 little surprises
old sales fliers of some way of numbering your caps
construction paper
glue and or modge-podge
scissors
Process
1. Gather your caps and toys.
 I used all sorts of things. from stickers and tiny toys to little treasures from my own stash. I just tried to make it something he would love or find amusing.( like wolvie's lost claw)
 Lay the caps out on a tray with the toys in them and make sure the lid can lay flat against the tray. Also try not to use items that are too heavy. I think candy is a great idea if you do candy( we r trying not to right now) also stickers work great too.
~2.Cut Your tree. There is no specific size I just wanted it big enough to hold my bottle caps nicely.
 I used a mason jar box. Open it flat. On one of your short sides mark the halfway point. This is your treetop. draw a straight line from the pint to each corner on at the bottom of the box.
  Cut along these lines. add on a proportionate tree base ( mine had one for me)and reinforce your tree anywhere you need on the back with extra card board and tape.
~3.Cut your tree cover and backing. Choose some fabric or decorative paper for your tree and the trunk. I had this really cute vintage green and red woven fabric, That is not Christmas really, but I always think it is.

Lay out your cover and trim it to about 3/4 " around your tree. Do the same to the trunk allowing for the truck be covered under the button edge of the tree. Stitch or pink a finished edge along the bottom of your tree because it will not be folded under to the back side. (or leave it raw if you like).
 Cut a piece of felt that will cover the entire back side of your tree including the trunk
4.Glue your cover to your tree. Using your hot glue first glue the trunk cover in place then the tree cover.
5. Attach your hanging ribbon. Using @ 8-10" of ribbon make a loop and attach it to the back of the tree at the tip top.

6. Glue the backing onto your tree. Trim any excess once you have it glued.

7. Add any garland or other embellishments to your tree.

8. Arrange and glue your caps.

Decide where you want each cap then line the edge of the cap with hot glue and adhere it to the tree. You don't have to go too crazy here because you want them to pull off kinda easily.
9.Number each cap.

I used cut outs from all the gazillion black Friday and pr thanksgiving fliers we got in the mail.
I went through and found 1-24 in varying fonts
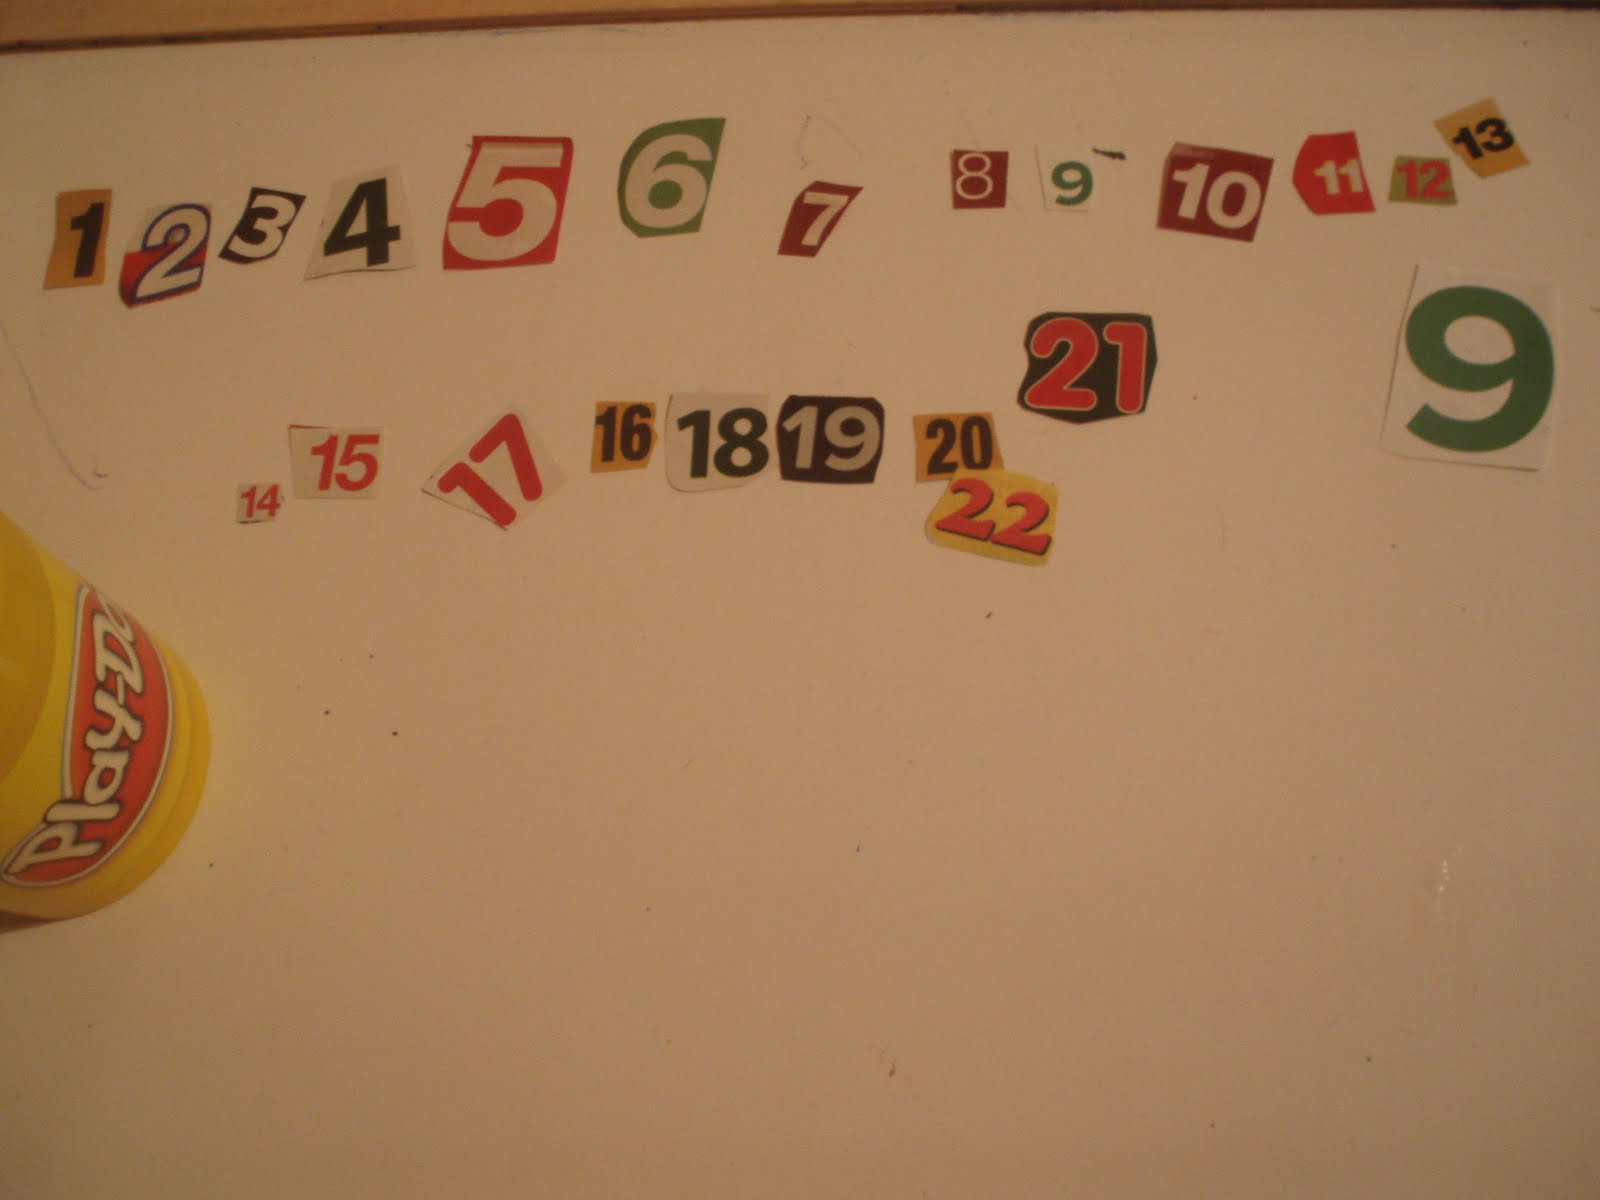 keeping in mind the size of the bottle cap.
  Kg cut out coordinating stars in multiple sizes from construction paper.
  I used glue and modge-podge here.
  I made the numbered star first with glue and adhered it to the cap. I then glazed the whole thing with modge-podge. Let it sit over night to dry
10. count down the days till Christmas!


6 comments:
So awesome! Great idea!
oh chas this is just wonderful....really really great. sorry i've been MIA, my ma seems to suck the life out of me, god I hope it's not genetic ;)
So easy, even Dads can help ;) ... fun, I must start collecting stuff!
This is so cute! Very creative!
That's a fantastic idea!
This is such a great idea! I always keep bottle tops and have been wanting to find a great way to use them - this is it!I am going to put a link to it on my blog today!
Post a Comment