Showing posts with label recipe. Show all posts

Friday, August 20, 2010

for the love of long hot summers and okra... A recipe


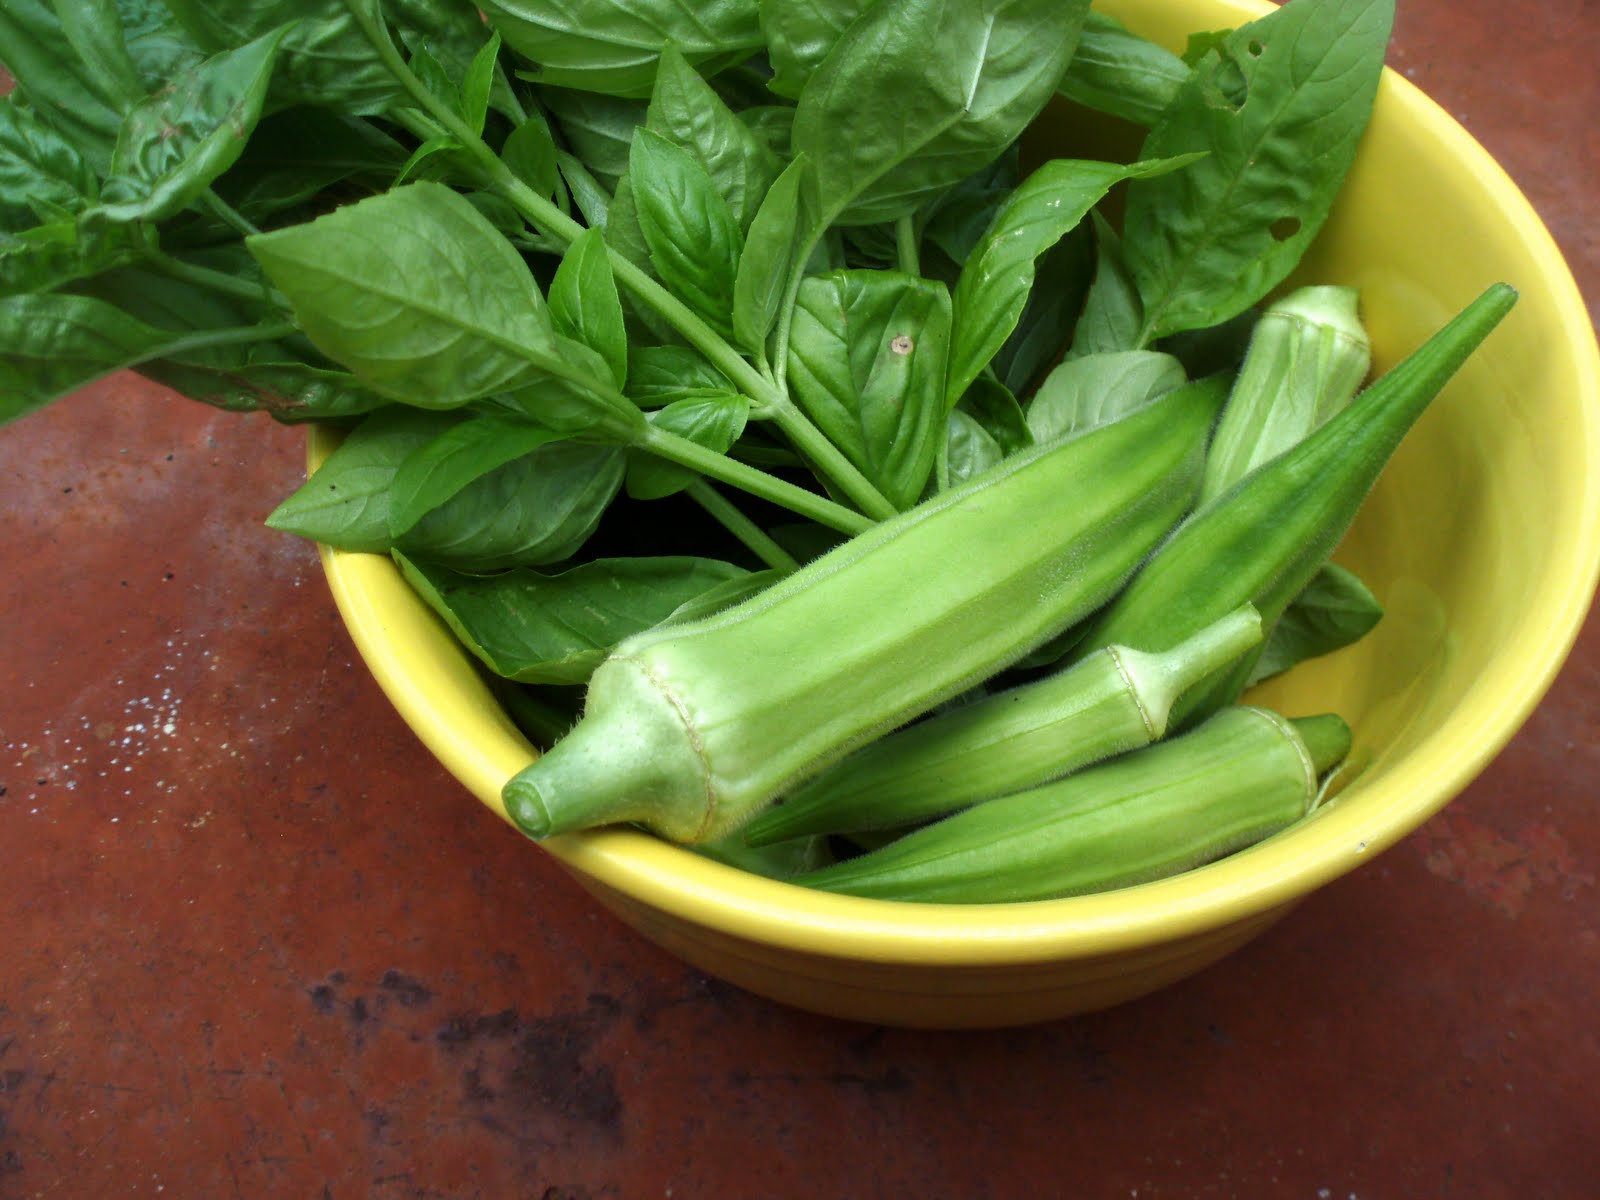
~Late summer is rough in central Texas, so I am thankful it is perfect for big beautiful okra plants. These plants tend to bring loads of okra that need rescuing from the fry daddy. One of my preferred rescue method is stewed with tomatoes. If we are lucky there are still plenty of ripening tomatoes sitting about the sills and counter tops. It was not until I started growing my own okra that I started branching out to other methods of okra cooking rather than fried. Its funny, my Nanny always grew and cooked okra, it was a staple in the summer at family meals at her house. She also froze enough for Thanksgiving and Christmas, however I only remember it fried. This is probably cause I was a kid and would not eat unidentified goulashes. Another late summer pleasure of course is homegrown tomatoes. Tomatoes were another thing I had issue with as very small child. I remember very clearly the day I discovered how yummy fresh sliced tomatoes were. I must have been 6 or so and I was at my Nanny's neighbors house playing with their grand kids. I do not even remember the folks names (or faces) but I remember that sweet tomato slice . I didn't want to try it but I was raised polite-like. Well any ways here is my recipe for Stewed tomatoes with okra


Ingredients
2-3 slices bacon
1/2 c sweet chopped onion
3 medium tomatoes diced
one mess of okra( about lb or so)sliced or whole
Tony's to taste( or just salt and pepper)
1-2 c stock

* a word about okra prep. I like mine whole if they are not too big, otherwise slice them up. You can trim the cams and tips if you like. I leave them on the wholes and trim them if I am slicing.

Process
cook bacon , add onion cook till translucent, add tomatoes and seasoning. De glaze with 1/2 c stock. Add okra and fill till just covered with stock. Bring to a boil then simmer for about 30 min.


PS....Enjoy the slime, It is yummy and very good for you. Did I mention how amazingly beautiful and lovely the okra flowers are? Another way to get into some okra lovin' is pickled okra, Kg's mom makes some kickin' pickled okra, However, if you are not us it does come to your local grocer... If you have never tried it go now and get you some !


Sunday, January 3, 2010

For your comfort, "Chick & Dumplin'"

~As I drudge through my 7Th day of sickness, and I open a can of chicken noodle for me and the lil one to eat, I wish I had a roasted chicken carcass in my fridge (instead I have thawed deer chili meat...later about that). If I did have a carcass in my fridge I usually have the breast meat in tact or in a baggy. That is where this recipe usually starts for me.
I originally got this recipe from Mae Me about 5 years ago after KG and I were first married (or right before?).... I still have that thick scrap of printing paper with the words chick& dumplin etched on it in neon pink sharpieCan you see the way my little brain works? I can't, but this worked for me, for years and now I find my 'chick and dumpli' have completely evolved....ok so KG reads this post and says to me "you realize the recipe is written on the back of one of our wedding invitations"It was actually just a scrap from a our handmade by, ME, wedding invitations...oops!?!, So for the record it was right AFTER we got married....


~When I first started making this recipe I used to start by boiling the chicken. For our taste, legs and thighs (our favorite part of a chicken) with onion garlic and celery then I would fish out the bones and finish the recipe(usually leaving some small sharp bones, Ouch!) . At the time I had only been a meat eater for a short while and I had never roasted anything and did not realize the prolific~ness of a whole roasted chicken. Nor did I realize that one should try never to boil meat that you intend to eat unless it is cased like a sausage or already cooked with the flavor locked in by searing or roasting(again incased). When I started roasting chickens ( yet another post ) I realized we had enough meat usually for 2 or 3 more meals(two dinners and 2 lunches) plus all these bones for stock, KG was really getting into stock making.

As for the tattered recipe card I realize I only look at it now to remind myself that it is 10 min for the dumplings. So here is my adaptation.

Ingredients
*Chicken about 2-4servings gotten one of these ways
roasted whole chicken and bones this is what I do (usually the day after we had legs and
thighs leaving me with breast meat and bones)
Or you could roast 2 leg quarters and pull that meat off and use the bones for stock
or pan cook a couple of breasts and use store bought stock.If you do this use the saute
pan to cook your breast meat then set the meat aside and cook your veggies in that pan.
*Stock about 2 cups home made plus 2 cup of h2o
or 3 cups store box stock.
*frozen or canned southern style biscuits
*3 TB unsalted butter
*2 TB olive oil
*1c heavy cream
*Finely chop the following veggies
*1 Small onion
*2 carrots
*2 celery stalks
*2 garlic cloves
*1-2 tsp garlic salt
*2 TB herbs De Provencal
*1tsp ground sage or 1 TB fresh sage leaves
*salt and ground pepper to taste


STOCK
Here is how I get my stock (I think this is probably a non -traditional method).
Boil bone and vegetable remnants( we have a gallon zip lock bag in the freezer for when we the extra stuff that we don't usually use in food we eat and also things that are about to go bad, I also through the bones of the chicken in the freezer if I am not making my stock right away.)
If you have no veggie remnants use about: 2 carrots 2 celery stalks 4 garlics 1/2 and onion and a small handful of whole pepper corns. I usually just fill the pan with water and reduce i down to around 2 or 3 cups and I strain the stock. This is usually 2 hours at least. I just do it early in the day and then keep checking it. I leave it covered for most of the time.


SOUP
In another pan ( the pan shown is my favorite soup pan it is a very wide lidded saute pan)
I saute on med high in 1 TB butter 2TB olive oil onion, garlic, celery,carrots,until tender add in all herbs and garlic salt and ground pepper About 10-15 min total here. Add coarsely chopped chicken, allowing things to get nice and crispy but not burned probably 5-7 min. De glaze your pan with about a cup of your stock making sure to get all the yummy bits form the bottom of your pan loose with your stock. Add the rest of your stock and enough water to bring the liquid up to about 3 cups, and cook over medium flame for 30m or so. Add cream and 2 TB butter and simmer on super low for another 20 in or so . Mean while cut biscuits into quarters. Now gently add your biscuits, cover and cook for ten min(leave the cover on for 10 min no peeking) After that remove lid allow a VERY low boil for another 10 min or so. This is why I like to use my widest covered pan I think the more surface area you have the better for your dumplings. I know That maybe I should make my own dumplings and one day I will but this seems to work fine for now.

Monday, October 5, 2009

Sweet, Simple and Yummy

~This is one of my favorite pre-dinner indulgences. We usually do this with your regular old round peppery radishes( and it is very yummy just the same) but KG got some fancy french breakfast radishes this week. ....The flavor of this radish is crisp and mild perfect for this little snack.

Radishes with butter and kosher salt

Ingredients
radishes
unsalted cold butter
kosher salt

procedure

All you do is slice the radish about half way and then slice little piece out then replace it with a sliver of butter and sprinkle some salt on them. KG got me hooked on these.

Friday, May 29, 2009

Watermelon Agua Fresca


~I have had some really terrible luck with water melon purchases this year so far. If my dad was around he would harp on me for buying those overpriced seedless(tasteless) watermelons. However he was not dealing with a 7 month old that loved watermelon( or was he) And seedless water melons have come a long way in the last decade( maybe).

....Well my 7 month old is going on 3 now and I can probably give him the grown up kind but I have been dazzled by cheap seedless prices 3 times in the last month. All 3 times each water melon left much to be desired. Even Burger wasn't really going for it. Not even kosher salt was helping the tasteless melons. So I made a few batches of Popsicles(later post)which were quite yummy but in abundance.

~I started day dreaming about this little place I used to frequent in Tucson called Little Cafe Poca Cosa. They had terrific food and always a packed house and always 4-5 fresh Agua frescas that would be sucked up quickly by their sun soaked patrons. These refreshing beverages were the type of thing that drew you into an eatery. Quite addictive.

So I began trying salvage something from my tasteless water melons and here is what I have finalized after repeating it now 4 or 5 times. The recipe makes enough for a nice afternoon refresher for 2 . If you are making the drink for a meal or group of thirsty beasts; I would double it, or make several batches. It is not really something I would keep for more that a few hours in the fridge. The beauty of these drinks is their freshness

Water melon Agua fresca

2 cups cold water melon
1/8 -1/4 c sugar
big pinch kosher salt
1/2 c cold water
*mint leaves for garnish

This is a pretty loose recipe. I put my melon in the blender. Then the Sugar( more or less to how unsweet your melon is). The salt and then I add just enough water to make it go .
The mint was an accidental treat! I was trying to make it pretty for the photo shoot and then I drank it with the mint and it add an amazingly fresh finish. I am sure lime would also go really well in this beverage and now I am thinking some rum might be nice too...sort of a watermelon mojito thingy. OK I will stop ...happy lazy summer

Thursday, May 14, 2009

Borrowed Squash Blossom Soup


~I was admiring a friends squash blossoms on FB the other week and mentioned I had a good recipe for Squash Blossom soup. Well I finally retrieved it out of the depths of my recipe box and found it was just scribbled on a yellowed scrap of paper with no info on where it came from. It is pretty simple, and probably a common recipe but I love it so I will share it!

Squash Blossom soup

3 tb butter

1 small onion
1 clove garlic
3 dozen squash flowers
3c chx broth
1 c 1/2 and 1/2

In large pan saute onion and garlic in butter till soft
add blossoms
add broth
bring to a boil and simmer for 10 min
puree the soup( let cool or be very careful)!!!!
return to pan and add 1/2 and 1/2 heat back to a simmer and serve


~I think this is a perfect summer soup, and it is such a pretty soup as well! From the looks of our squash plants I hope to make us some in the next few weeks!!

Wednesday, March 18, 2009

Yes I know it is spring...My pumpkin bread adaptation


~Muffins and breads are burger's favorite and pumpkin tops the list . So I make them year round. I like the zucchini added because that is the only way he eats it so far. I started using this pumpkin zucchini bread recipe almost 3 years ago. While making some bread early this week I realized, I had done gone and changed the recipe... quite a bit; So I am gonna share my version.
~I think my adaptation makes an extra moist(from extra pumpkin) bread that is a little lighter in texture and color thanks to the white lily. I actually stumbled on the white lily thing by accident . I was 1/2 a cup shy of regular flour while making some pumpkin bread and subbed in 1/2 a cup of white lily. I liked the result so I used it in all my muffin/ bread recipes. This time I decided to sub a full cup and liked the result even more. Of course this is optional if you do not have white lily just use regular flour and don't worry about adjusting the baking powder/soda . You will just have a denser bread which maybe what you like anyway! I always use fresh pumpkin if it is available but plain can pumpkin works in a pinch(and last week target had bunch of can pumpkin on clearance). I know some of my fellow bloggy ladies freeze large amounts of pumpkin so they probably have frozen pumpkin on hand.

~Ingredients

* 3 eggs, lightly beaten
* 1 white cup sugar
* 1 cup brown sugar packed
* 1 can of pumpkin or 1 1/2 cup fresh or frozen pumpkin
* 1 cup butter or margarine, melted
* 1 tablespoon vanilla extract
* 2cups all-purpose flour
* 1 cup white lily
* 1 teaspoon baking soda
* 1/2 teaspoon baking powder
* 1/2 teaspoon salt
* 1/2 teaspoon ground cinnamon
* 1/2 teaspoon ground nutmeg
* 1/4 teaspoon ground allspice
* 1 cup shredded zucchini
* 1 cup chopped pecans(optional)

~DIRECTIONS

1. In a mixing bowl, combine eggs and sugar. Add pumpkin, butter and vanilla. Combine dry ingredients; gradually add to pumpkin mixture and mix well. Stir in zucchini and nuts. The original recipes says to Pour into two greased and floured 9-in. x 5-in. x 3-in. loaf pans. Bake at 350 degrees F for 45-50 minutes or until breads test done. Cool in pans 10 minutes. Remove to a wire rack.
2. I make six muffins minus the nuts (burger and daddy love muffins and not nuts in bread so much). I then mix and match the rest according to what pans I haveon hand... maybe some mini loaves if I am planning on giving them away. I always make one big one and freeze it for later. The boys just work around those nuts. I use a tooth pick to check the done-ness since the different pans have different cooking times. A clean tooth pick is always my best done-ness indicator.

Tuesday, February 17, 2009

I love you sticky rice with mango ..I really do.

There is a new love in my life and it's name is"Khao Neeo Mamuang".... or sticky rice with mango. I had my first taste at Thai fresh a few weeks ago(without mango). Then we went in for a family Valentine's treat and they were sold out(not surprising) . So Jam said, "you can make it at home" and gathered up a small pile of ingredients from their market and sent me on my way to conquer my own sticky rice.
( this is not my photo we ate ours to fast to photograph) One of the most important aspects of the sticky rice is the rice you use called, sticky rice or sweet rice.
Also important to this dish is that you soak the rice over night or at least four hours.
Steaming the rice (not boiling) is also important.
I steamed my rice in a dim sum stacked bamboo steamer lined with flour sack towels and it came out perfect.
This is the real deal bamboo rice steamer and now I think I need one.
I used Mexican mangoes cause that is what we have at our market right now. I do not think I have ever had a Thai mango, but they are said to be sweeter and creamier than their Mexican counterparts.( and some would say I have never really tasted a real mango)(the Mexican mango is on the left and Indian mango on the right)


~Needless to say my sticky rice was delish. Jam was right, I could make it at home!!... and so can you. I think it makes a great breakfast as well, if you have a picky lil monster like me.
Jam also said I could cut the sugar or use agave nectar as the sweetener if I like, I went with her recipe as is though, so I would have a good reference point. I found that I did not need to change it for our house's taste buds.

~The pandan leaves are kin to a vanilla type flavor....They definitely have their own distinct flavor , but it acts like an accent to the sugar flavor the way vanilla adds depth.I think they are the secret ingredient here, I got mine from Jam and the coconut cream and rice and it was all around 5 bucks.
This will be a mainstay through the end of the summer around this house. I think it would be tasty with other fruits as well , strawberries for sure!


Here is Jam's recipe from her blog Thai cooking with jam

2 cups sweet or glutinous rice (either long grain or short grain. Long grain is preferred just because that’s the kind we use in Thailand but if you have short grains, they work just as good. It will take longer to cook short grains because the grain is thicker)
2 cups coconut cream (a small can)
1 cup sugar
large pinch of salt
Pandunas Leaves or Pandan leaves or the essence (optional)

Soak rice overnight or for about 4 hours. Drain, rinse and steam over medium heat in a steamer for about 15-20 minutes. Any steamer will do just fine. If you have one of those bamboo steamer, go for it. Check if the rice is cooked from the thickest part of the pile.

If a steamer is not available, put soaked sticky rice in a bowl and cover with a dish or cheesecloth. Cook for 3 minutes without adding any water. Check if the rice is cooked, if not, then cook for another 3 minutes and keep checking.

Meanwhile, in a pan, heat coconut milk, add sugar and a pinch of salt. Stir until dissolved. If using Pandunas leave, add it to the sauce and simmer for about 5 minutes to let it infuse into the sauce. When the rice is cooked, pour prepared coconut cream over rice. Stir to mix thoroughly. Cover and set aside for 15 minutes in a warm place.


Tuesday, November 25, 2008

My daddy's favorite christmas cookie


I have been making these cookies for at least four years straight as my regular "gift" cookie and I ain't got no complaints yet! The men love them..they actually start asking about them around this time of year.
They are also a great cookie to send in the mail because they will stay yummy well over a week and a half( I have never had a batch last longer then that). My daddy just loved them!
I make my batter ahead of time and store the whole bowl in the freezer then bake them off s I need. I think they bake off better even right out of the freezer(just thawed enough to scoop out the dough. I use heaping tablespoon for each cookie and cook them on the light side for a chewier cookie but with all the coconut in them they really are chewy even if you burn them(which I have done) A few times this summer omitted the chocolate chips and nuts and I added raisins. Burger loved them(he doesn't really dig chocolate). So this year I will do at least a third with raisins I thought of adding some peanut butter to part of the batch as well I have not made mine yet ...probably another week or two then I will start. My mom sent me a bunch of good looking cookie recipes so I will share some of those as well. Happy cookie making!


Cowboy cookies

This makes 3 dozen large or 6 dozen small

3 c flour
*1tsp baking powder
*1 tsp baking soda
*1tsp cinnamon
*1tsp salt
*1 1/2 c room temp butter
*2c +1tbsp sugar
*2c light brown sugar packed
*3 eggs
*1 tsp vanilla
*2 1/4 c semisweet choc chips
*3 c old-fashioned oats
*2 c sweetened flake coconut
*2 c pecans chopped

Preheat oven 350
~Mix flour, baking powder, soda, cinnamon, salt
~Beat butter on medium till smooth and creamy (about 1 min)
~Gradually add sugar. Add eggs one at a time beat after each then add vanilla
~Stir the flour mixture into butter, just combined. Add chips, oats, coconut and nuts

On ungreased cookie sheets
For really big cookies use 1/4 c of dough
3 in apart cook for 20-30 min
Until edges are lightly browned; turn sheets halfway through.
For a smaller cookie (I prefer maybe a little smaller even) 2 tbsp dough bake 15-18 minutes

Tuesday, November 11, 2008

Pumpkin Ravioli in Brown Butter Sauce with Sage

In the first 3 months after my son was born ( and the month I was on bed rest before he was born) While learning to nurse, snuggling, and recovering from childbirth(Cesarean) I watched lots and lots of law and order( love me some Chris Noth cicra 1990)

... and the cooking network . My favorite was of course Paula Dean cause well cause she is Paula( it was like my mama was right there instead of in Bama).
But in the kitchen I find I like her tips more than her recipes. When put to the test Giada's Everyday Itailian had the recipes that worked time and time again. they suited mine and daddy's taste best. (my mother in-law , who is a master in the kitchen loves Ina and does well tweaking her recipes but I did not have as good of luck). Any way I learned a lot of smart things from that skinny Italian girl Anyone who pushes Nutella as this lady does is alright by me (no matter how skinny she is) . The first was something I tried for valentines; which was chocolate raviolis using wonton wrappers for the pasta and Nutella for the filling. Very delish,very very yummy.
So then My mom got me Giada's book Everyday Italian
and I must say I use it even more that my Loretta Lynn cookbook,"you're cookin' it country"


The great thing about Giada's book is that the recpies are easy to make your own . She has a great marinara that I keep stocked in my freezer, I also use the brown butter sauce recipe(below), on all kinds of pasta.
So what is this post about? Well I had about half of my sugar pumpkin puree' left from the pumpkin zucchini bread I made last week. It was getting past the stage of being able to freeze it. So I decide to make some pumpkin raviolis. Giada actually has a recipe in her book for this but she bought the pumpkin raviolis. I bought some about a month ago and they were so bland that daddy was a little testy during dinner( no meat and bland raviolis).
So anyway I started doing a little recipe hunt and found these beautiful photos of ravioli using wonton wrappers also, on Wandering Chopsticks. This recipe seemed a little too bland for the discerning taste buds of my man so I searched on and found one from Martha.
This one looked interesting but I did not have the Locatelli cheese..and my food budget was already in the fridge this week. So I decided to wing it and the recipe below is what I came up with.

Pumpkin Ravioli

Wonton wrappers
1/12 c fresh pumpkin puree’
1/2tsp kosher salt to taste
Fresh ground pepper
1/4c fresh grated Parmesan
2-3 Tb brown sugar
1 tb fresh chopped sage
1/8 tsp nutmeg

Brown Butter Sauce with Sage
from my memory of
Giada's Everyday Itailian
recipe
6-8 sage leaves torn into pieces
One stick of salted butter (yummy)
Pinch nutmeg
Salt
Pepper
1/2 c grated Parmesan
Adapted from everyday Italian
Cook butter on med heat till pale about 4-6 minutes
Add sage leaves fry in butter till crisp (about 2-3 minute)
Add salt pepper and nutmeg
Add ravioli then toss in cheese and serve
Garnish with Parmesan and fresh pepper

~As you can see I use about half a teaspoon of the filling in each wrapper
~Then brush one side with egg wash or water if you are out of eggs and fold over into a little triangle and crimp the edges lightly with a fork.~ This amount of filling made about 35-40 raviolis. I did not take photos last night...because honestly I did not have a lot of faith in the recipe I also only made half of the raviolis(for the same reason). So today I made the rest and froze them . ~I also made 2 for Burger's lunch at his request. I didn't bother to make sauce for these; I just put a pat of butter and some Parmesan on them and called it lunch.

~I was surprised to find that they tasted even better today after sitting in the fridge all night I guess the filling reached a peak flavor... Anyway I was very excited and so I am sharing.