~To be totally honest I will probably never have a table large enough to set with napkin rings,
But if a child of mine made these for me, I would sing another tune. I conjured this design as I was drifting off one night. I was trying to figure out a way to display my new stock of recycled fabric napkin sets. I decided it was only fitting if I had made recycled napkin rings as well. So here is what I came up with. I have not tried this with kids but it just strikes me as a fun(messy) project for the munchkins!
materials
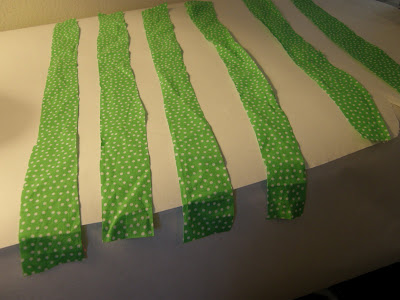
4-8, 1.5"x14" fabric scraps
modge podge or equivalent medium
1 paper towel or 3 toilet paper card board bones
big craft bowl
wax paper
paint brush
scissors
1. measure and cut your fabric scraps.
 and your cardboard rings
You can make as many as you like I made 6 ,
but you can get 8, 1.25" rings from 1 paper towel bone
 *notice I am using craft scissors here (my shears are far away in an undisclosed safe location)
2.fill your craft bowl with some modge podge (I put about 1/4 to1/2of my bottle in the bowl so I have plenty to dip in . You can always put the leftover back in the jar)


3.Dip your strip into the bowl of medium. Saturate the entire strip , then squeegee the excess out flattening the fabric strip as you squeeze.

4. wrap the card board rings with the fabric . I approach a a bit of an angle started on the inside
 and it should wraps all the way around with a slight overlap, if you come up short just use another piece of fabric in order to complete the wrap. One time around with fabric is plenty to create a stiff ring.
5. smooth and smoosh your ring, hand molding if need be.

6. dry on wax paper overnight. I like to flip them halfway thru drying and smooth ant drips with a brush.

7. apply another coat of medium with a brush.
 I stop here with my finish. I let them dry again for at least a day on wax paper
I like the sort of satin finish of the bare modge podge pictured here. I also like that you can still get a feel for the fabric I did try adding a sealant that was glossy( not shown). I did not like it so much, but you might


10 comments:
Great tutorial! Love how those turned out!
I think I might try to make a bracelet like this. Just have to figure out how to get large enough cardboard bones. Perhaps if I take a strip of cardboard and tape it into a ring...? we'll see. thanks for the inspiration.
Cool!
What a fun idea and so easy to customize, I love that! I'll be linking.
I'll be celebrating my 3rd mother's day as well. I should "accidentally" leave this page open to my hubby. Perhaps it would inspire an activity with my girl. ;)
That sounds very funny to make! My kid will love making those with me! Thanks!
awesome tutorial chas! they look great and seem so fun and easy to make (maybe quinny and i will try it!) xo
So great! Perfect for those scraps I can never throw away. Thanks for sharing!
I love this! It's perfect for my daughter to make (she is such a crafter, just like me!)
Thanks for the tutorial, the pictures are great for mom's to show kids before the project starts.
I will have to try these out. Super cool idea.
Post a Comment